Last December at the Pepcom Digital Experience show held in New York, one vendor’s table stood out. Instead of the usual plethora of black boxes, cables, headphones, computers, memory chips, or software, this table had glowing gardens of vegetables, flowers, and herbs - a beautiful refuge from the chill of winter. The source of all that greenery was a selection of small tabletop hydroponic gardens from AeroGrow, a Boulder, Colorado based company that has a strategic partnership with Scotts Miracle-Gro. We stopped to admire the plants, and were curious as to how the AeroGrow units work, the costs, and how much skill is required for such a verdant display of gardening, even during the coldest part of the year. The answer to all of the above was to be provided in short order. When AeroGrow offered to send out a review unit, it piqued our curiosity - we were fascinated with how this combination of computer technology, circulation pumps, UV-rich light sources, nutrients, and seeds worked in practice.
Most folks use the Labor Day weekend as a chance to relax, to mourn the end of summer, to clean the house, and prepare for the start of the new school year. In our household, all the above were true, but what really mattered to us was how to prepare our AeroGarden ULTRA and ULTRA LED tabletop gardens for the dead of winter. You see, with a little careful planning now, our home will be full of fresh herbs, tomatoes, salad greens, hot peppers, and even some flowers in just a few months, just when fresh local veggies are a supermarket illusion.
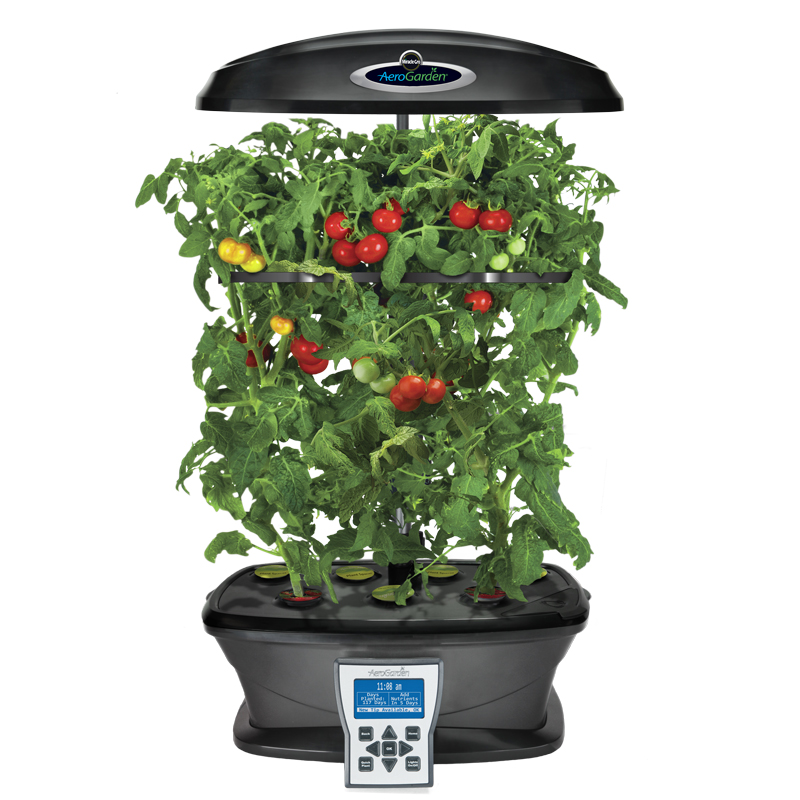
A bit of background on the units. They are small – approximately 1’ wide by 2’ long, with a light source positioned above the growing platform positioned on an adjustable aluminum strut. Unpacking the units might be the most difficult aspect of setting them up, but it only took us about 10 minutes. Just unpack the parts, plug the three CFL grow lights into the ULTRA model, or in the case of the ULTRA LED model, just take it out of the plastic bag; attach to the support strut and you are ready to go. The units are the same except for their light sources, and a bit of shiny metal trim on the ULTRA LED. They sport the same computer, base, pump, parts, and accessories.
We thoroughly rinsed out the main reservoir, just in case there was any residue from manufacturing. Then we filled it with water to ¾ full, placed it on the base unit, put the cover of the garden in place, mounted the LED bulbs to the metal strut, and that was it. All ready to go. We’d originally placed the AeroGrow in our dining room, but realized that folks driving by might see the indoor glowing and think we were filming an episode of “Weeds,” so we moved it into our kitchen, where we have more space, and it can sit on a waterproof table as well as be closer to our meal prep area. There is an occasional bit of water spillage at times when filling and draining, so keep this in mind when finding a place for your garden. Fine woodwork - not so practical; water impervious table or counter top - perfect!
When choosing a location, make sure you set in up in a place that isn’t too far from an outlet. The ULTRA shipped with three CFL grow bulbs, and a starter pack of herbs, including cilantro, dill, two types of basil, and chives, plus a small bottle of nutrients. Getting it started is a piece of cake. Just insert the seed pods into the holes in the top of the unit, place the small “incubator” plastic covers over each pod to assist in germination, and then add the designated amount of nutrient, measured precisely with the supplied measuring cup. Add a bit of water afterward to make sure the nutrient is dissolving properly.
Next, plug in the unit, and the front display panel boots up. Set the time, date, type of garden, and other bits of information, and you’re finished. Seriously. You’re finished. Just sit back as the unit’s internal pump quietly circulates the water and nutrient mix, and the lights turn on and off automatically each day according to the computer’s instructions. It can be customized if desired.
Although we didn’t notice any common garden pests, the ULTRA garden did have one serious predatory threat. It turns out our cats loved batting the little clear germination covers off the unit, so we had to jury-rig a protective shield around the garden made from aluminum banquet trays, which not only kept the kittens away, but reflected light back into the garden. AeroGarden sells a more elegant version of this called PowerBoosters, reflecting Mylar sheets that attach to the back of the lights, used primarily with the CFL grow lights since they are more diffuse than the direct light of the LEDs. We suggested to AeroGarden that a cat guard might be a great future accessory, to ward off curious felines and protect young seedlings.
Once we got used to our downstairs glowing with a cheery bright light during the day and into the night, we kind of forgot about it. Once in a while the display admonished us to add water or nutrients, but that was it. Then, a week or so after we’d set it up, we peeked inside of our makeshift pet guard, and - wow! - the seeds had sprouted! When the sprouts hit the top of the germination covers, it’s time to remove them to allow for normal growth. Luckily, by this time our cats had found other, more expensive things to paw at, so we were able to dismantle the front of the guard we built. Each day we’d notice a little bit of growth, although our cilantro didn’t seem to germinate. Finally, about a month later when all the other seeds had become thriving plants, a weak cilantro sprout appeared, but didn’t stay around very long. When I mentioned this to AeroGrow they promptly popped a new one in the mail, which, as we had read in the user comments on their forum, is typical of their customer service.
In about two months, we had big, bushy, bright green plants to harvest from. Harvesting was actually the most difficult procedure. First, who wants to harm their plants? We were slightly worried about harming them by overharvesting. But harvesting really is key to the success of your garden. Importantly, the taller or larger plants can’t be allowed to block the light from smaller plants, so it is important to constantly prune and trim, which has the benefit of keeping your garden healthy. It also keeps you healthy by providing a constant source of fresh flavors for salads, dishes, and cooking.
We did have a few hitches, but these are typical and normal. The CFL Grow bulbs are rated to last six months, and while they might seem to be working past that length of time, the amount of UV light they produce falls off fairly precipitously. The display gives a warning as the time to replace them grows near. When we noticed that a couple of bulbs were starting to flicker, we reported it to AeroGarden who once again stood behind them and sent out replacements. Other than that, the unit was trouble-free and foolproof.
Along the way we did make a few discoveries. The first is that you must be vigilant about adding water, at least once a week it seems. Keeping an eye on water levels is critical. The display warns when it senses a low water level, which is helpful. Nutrients must be added about every two weeks. Because we travel quite a bit, we don’t want to worry about our plants while we’re away so we requested a sample of their AeroVoir AeroGarden Reservoir. It looks like a miniature bottled water dispenser but when filled and attached to the AeroGarden, it is good for at least a week or two. Unless you have a reliable house sitter who can look in on your garden while you on vacation, we recommend buying the AeroVoir to make sure your plants don’t go thirsty. (You may still need to ask someone to add nutrients as needed.) There’s also is a nifty siphon to help drain the unit at the end of the growing sequence. Other accessories, such as a trellis system, are included with the Ultra – the trellis comes in handy if you’re growing peppers or tomatoes.
Last spring, AeroGarden introduced the ULTRA LED that uses a bank of LEDs as the light source. Because the LED lights promise a lifespan of at least five years, lower energy costs, and more direct light for better yields, we recommend that users consider that unit since the cost of replacing the CFL grow bulbs will quickly overtake the initial higher expense for the LED model. Do these gardens make financial sense? Probably not quite a break-even source for herbs and veggies. The initial cost is high, bulbs must be replaced on the ULTRA, and the cost for seedpods and nutrients is something to consider. However, like most hobbies we grow to love (pun intended) cost isn't the ultimate factor. Since we first set up our review model, we haven’t had a guest who didn’t comment on the beautiful, fresh plants; some friends even purchased one for themselves. And there is the undeniable cool factor of having fresh herbs and vegetables last year in the middle of what was a very cold, long, and snowy winter on the east coast
At some point, you will need to start a new garden. This means either discarding your plants or transferring to a pot or your garden. We did notice our plants slowly getting leggy and losing luster, so over the summer, we drained the unit (first carefully removing the lights, unplugging the pump power cord, removing the roots that had accumulated, and then dumping the water out into the kitchen sink). You are advised to sterilize the unit, by rinsing, removing any leftover roots and bits; then filling the reservoir, adding ¼ cup of bleach, running for five minutes, then rinsing, filling again, and another five-minute runtime to make sure the pump is free of bleach. Then dump, rinse one final time, and the unit is ready for a new season. We found that despite having a filter on the pump, some fine roots had wound themselves inside the pump housing, so we unscrewed the two Phillips head screws, cleaned out the assembly, and put it all back together. This took less than ten minutes. After that, our biggest problem was deciding what to plant next.
For advice, we looked at the forums, which are full of customers who are obviously smitten with their AeroGardens, all with different advice, approaches, and conclusions. We reached out to Ben Gill and John Thompson of AeroGarden for their advice, and from their responses, it was clear that not only did they work for AeroGarden; they were enthusiastic indoor gardeners. For the first go-round we simply did what any customer would do, plant the herb sampler that shipped with the unit. This time, however now with two units to populate, we can diversify and experiment.
Based on advice that Ben and John offered, one garden will feature salad greens (different types of lettuce), along with some flowers for color, and some herbs to make those salads and pasta zing! We love the hedonistic treat of freshly made pesto. Our other garden will have tomatoes and hot peppers, which will make a good pair, as both plants tend to spread out, and need more room. As acknowledgment, those seed packs are shipped with three pods, and spacers, to provide a bit more breathing room. So, our plan is to plant two tomato plants and one hot pepper in the LED unit, and leave four openings fallow. To see how this turns out, stay tuned for part two of our story as we provide continued coverage of, so look forward to our coverage of the LED Ultra, and our growing adventures.
Overall, we found the AeroGarden Ultra a wonderful product, easy to use, well made, and versatile. If you plant in the fall, your winter will be full of delicious, nutritious, pesticide-free produce. Don’t wait to the holidays to give yourself a gift; consider treating yourself or someone you love now to an AeroGarden, so the holidays won’t be simply joyous, they can be delicious as well! The AeroGarden Ultra comes highly recommended.
Nancy Burlan and Harris Fogel, Posted 9/14/2014
For more information the AeroGarden Ultra visit: www.aerogarden.com